27 January 2012

Let's get technical - Dynamic Range & Histogram

In statistics, a histogram is a graphical representation showing the distribution of data. In photography, a histogram shows the distribution of colors across the dynamic range of the camera or the color set of the image. Almost all cameras have a histogram display feature in them today, thus allowing you to judge whether your image is correctly exposed or not. To correctly understand histograms, you'd need to compare different images and their histograms. This post will simply help you understand what the graph on your screen says and whether you should listen to it all or not.

To understand histograms, let me first skim through the concepts of dynamic range and contrast ratio.

Dynamic Range
Each camera has a limit to the number of color/light levels that it can capture. This is called the Dynamic Range of the camera. Technically speaking, Dynamic Range describes the ratio between the maximum and minimum measurable light intensities (white and black, respectively). Let's try to understand this concept.

The sensor captures data in an analog form. This analog signal is then converted into a digital signal and sent to the camera's processor. Let's assume that the processor accepts an 8bit signal. So each pixel on the sensor sends out the pixel color/intensity information as an 8bit signal to the processor.

With 8 bits to represent each pixel signal, we end up with 28=256 levels of intensity within which this signal can lie. As shown below, a histogram in an 8bit digital camera shows the spread of different pixels between the darkest (0) and brightest(255) light intensities. Simply put, a histogram's vertical axis shows how much of the image is found at a particular brightness level. Here we can see that the image has more dark areas than bright. 

Coming back to the topic of dynamic range, a camera which uses more bits for encoding the analog pixel signal into a digital signal will have a wider bright-to-dark light spectrum and hence will capture colors more accurately at different light intensities.

Contrast Ratio
Some manufacturers or comparison websites express the camera's dynamic range with the term "contrast ratio". This number will look something like "1000:1". So how should we look at this concept?

Assume each pixel to be a bucket; a bucket that collects light photons. The more photons that a bucket collects, the brighter than bucket becomes. Now each bucket has a limit to the number of photons it can collect (and report to the camera processor). This depends on the number of bits used to convert the analog signal to digital. Let's assume the camera uses 8 bits which means the bucket can contain a maximum of 256 photons beyond which it will overflow (be overexposed). The lesser the photons, the darker the image.

Image courtesy: cambridgecolor.com
Contrast is the ratio between the brightness and darkness levels of the image. The lower the contrast, the more dirty/lacklustre/dusty the image looks; as you increase contrast, bright areas become brighter and dark areas become darker thus giving the image more clarity until a point beyond which the image starts looking unnatural. In the below image, starting from the lower left corner image (this image has the lowest contrast) you can see that as the contrast level is increased the dusty feel of the image starts wearing off and the image becomes more bright/sharp and clean. As we move clockwise towards the lower right image, the contrast levels have been increased too high to give the image an unnatural feel.

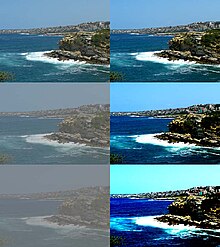
Image Courtesy: wikimedia.org
A contrast ratio of 1000:1 means the camera uses a minimum of 1 photon in a pixel to represent the darkest area as compared to a 1000 photons to represent the brightest area. The more the maximum number of photons that can be captured by the pixel, the larger the range of intensities that the sensor can capture. So a higher contrast ratio is always better since the camera will yield a higher dynamic range (provided the number of bits used by the camera for representing the light signal doesn't act as a limiter).

So to summarize, Dynamic Range/Contrast Ratio is the ratio between the maximum and minimum measurable light intensities.

How does dynamic range relate to histograms?
If you have accurately understood the point that I am trying to drive home, you may have realized that dynamic range forms the X-axis of the histogram - the range of brightness levels that the camera can capture :)
As the dynamic range increases, the width/number of intensity levels of the histogram increases and hence the graph becomes a more accurate representation of light intensities.

How does a histogram help?
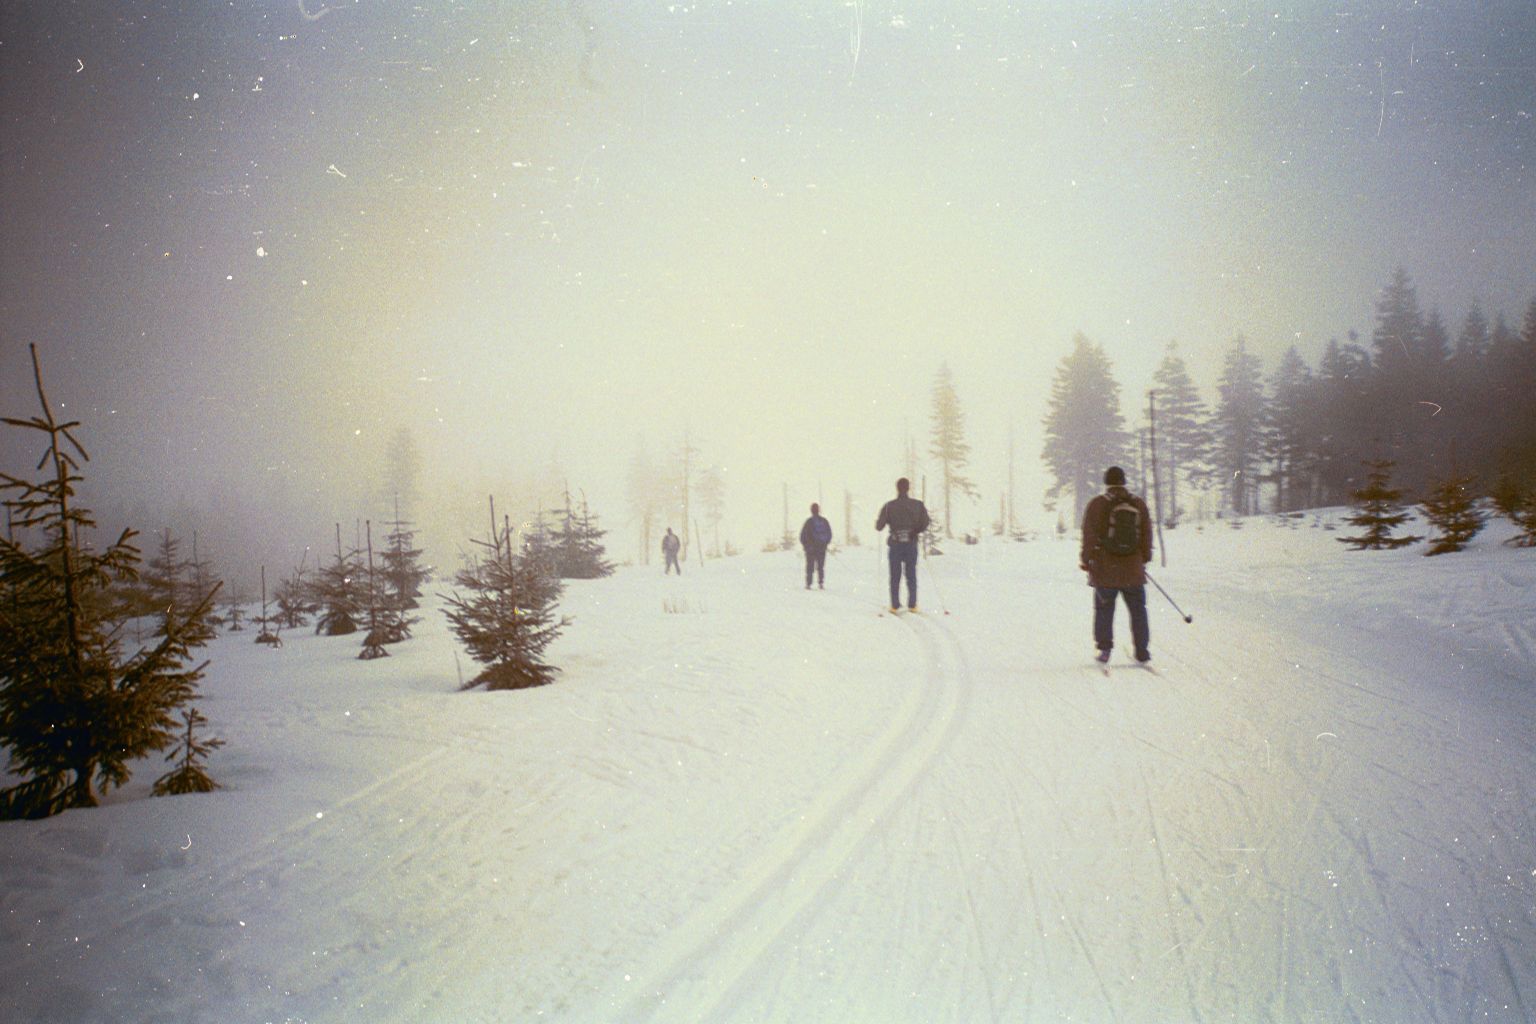
There is nothing called a "good histogram". A histogram only tells you whether the image has too many pixels at a particular brightness/darkness level or if the intensities are well spread out. Knowing this helps you avoid posterization during post-processing and helps gauge whether the image is over/under exposed. How do you judge the below histogram?

Image courtesy: luminous-landscape.com
If you do not look at the image and only check out the histogram, your knee-jerk judgement would be that it is a bad image, won't it? :) But histograms are certainly useful, as can be seen in this post.

12 January 2012

Keep it RAW!

Advanced cameras can capture and save images in JPEG as well as RAW formats. Though RAW format consumes more carpet area on your memory card, it is wonderful and may I say, the only option for post-processing. Let's have a look at why JPEGs are bad for post-processing/image correction.

How does the digital camera create an image?
Your camera sensor senses the incident light along with its different aspects like brightness, contrast, hue, the colors in it and many other things and applies a sophisticated algorithm to process all this detail and save it as an image on your memory card. This image can be saved with a lot of information or with minimal information so as to reduce the file size. If you save all the information possible, you can then selectively remove/polish/modify selective aspects of the saved image in an image editing program to yield desired results. If you remove much of the information and retail only as much as required for the image to be created with near-to-real reproduction, then you would achieve a much smaller sized email image which you can't do almost any post-production on. The previous type of image is called a loss-less image (RAW for example) while the other type is called a lossy image (JPEG).

What is a JPEG?
JPEGs were created as a web-friendly solution for images. Before JPEGs came into existence, the world worked with BMP images (which are quite rare these days but if you had a windows 95 PC, it did not recognize JPEGs; you had to install special software to work with JPEGs) which is an acronym for BITMAP. In BMP images, each pixel's color information was saved in the file. So if you have 1024x768 pixels in the image and each pixel took x bytes to save, you'd end up with 786432x bytes for one image. I remember BMP commonly weighing between 4-10 MB each. You can't have such heavy images on a webpage!

Enter the JPEG! It's an acronym which stand for Joint Photographic Experts Group, the geniuses who used their mathematical prowess to revolutionize image persistence and shrunk the 4MB BMP to a 100KB JPG!

Because JPEG employs a lossy compression technique, every time you open a JPEG and save it through a CTRL+S, it is compressed and saved. So each save compresses it further and leads to a further reduction in detail. So if you want to photoshop your images, JPEGs are not the ideal solution even if you save them in the highest resolution possible.

Lay it RAW!
RAW is not an acronym - it simple hints at the fact that the image has undergone minimal processing between the point of capture (sensor) and point of save (memory card). As such, it contains maximum optical information possible. Each manufacturer has his own RAW file format which needs you to install manufacturer-specific software/drivers to view the RAW image. Nikon uses the NEF file extension while Canon uses the CR2 extension.

Why should I use RAW?
There are multiple reasons for which you should shoot in RAW provided you are adept at using post-processing tools like GIMP/Photoshop or any other sophisticated image editing software.
  • White balance correction: if you have shot an image with incorrect whitebalance settings, you can use a RAW editing program to make the correction. In the below image, the upper section has correct whitebalance while the lower one has a warm tinge.
Image Courtesy: phottix.com
  • Exposure correction: if you image is over/under-exposed, you can make corrections to get correct exposure. The below screenshot shows an over-exposed sky in the RAW image at the bottom with the corrected sky above it. This level of exposure correction is not possible in JPEGs.
Image Courtesy: kelbymediagroup.com
  • JPEGs store information in 8bit format while RAW store in 12 to 16 bit format which leads to an amazing difference in the quality of image detail. Due to this, any of the processing done to a RAW file yields a better final image as compared to changes done to a JPEG.
  • Many alterations/corrections like brightness, saturation, hue, contrast, color correction, gamma correction, sharpening, noise reduction, etc should be ideally performed on RAW images only.


Ok what's the catch?
With all due respect, RAW is not for everybody. Don't shoot in RAW just because I said it yields better and sharper images. If you don't intend to do post-processing on it, it's just not worth the hassle since you will be simply converting them to JPEGs for circulation/distribution and you personal archive anyway :p
  • RAW needs manufacturer specific drivers/software installed to read the RAW file. For example, windows cannot read the NEF file (Nikon). You can access it through Nikon's RAW software or through third party tools like Adobe Lightroom which is a RAW editing software.
  • File size: RAW files are typically 4-6 times the size of the biggest JPEG that your camera can save. That means 1/4th-1/6th the number of photos that your camera can save. So if your card can save a max of 100 JPEGs of the highest resolution, it can save less than 25 RAW files!
  • RAW process workflow takes up quite some time for even the simplest operations: if you shoot 200 images in your brother's wedding and need to load them in a RAW processing tool, make corrections to them and save as JPEG - you'd need a fast processor, multiple hands like a demigod and multiple screens on which you can execute this shit in parallel to get it done in one day! It takes me upto a week to process RAW images of one photoshoot!
  • And of course, you need sufficient knowledge about the RAW processing tool too!
 I shoot in RAW, process in Lightroom and then polish in Photoshop to finally achieve the desired JPEG. Each image takes anywhere between 45-90 mins. You don't need to treat each image with such tender care and loving but if you have that kind of patience, stay RAW!

11 January 2012

Let's get technical - Lenses

When it comes to selecting SLR equipment, one needs to pay acute attention to lenses rather than camera bodies. Camera bodies are much easier to compare and judge than camera lenses. To start with, we have multiple lenses in a manufacturer's stable which look alike. For example, you'd often find two zoom lenses with the same focal range but with one or two other characters in its name differing - let's suppose an 18-55 VRII and an 18-55 D(these are hypothetical offerings and may not actually exist). To add to the buyer's miseries there are third party manufacturers like Sigma, Tamron who also have their league of lenses which look similar in nomenclature and confuse the already nervous buyer. People often ask me or quiz the retail shop guy "why is this 18-55 lens by ABC thrice as expensive as the other 18-55 lens by the same manufacturer" and the quizee goes "its made of better material...its simply better". I'd say dumb retailer but would you like it if he hurled a barrage of jargon in your face and made you look like a dumb camera aficionado in front of the other customers? It's wise to just lie down and take such answers once in a while :) 

In this post, I will pour out whatever little I know about how 2 differently priced seeming-twin lenses could actually be different so as to justify the discrimination in price between them.

How a lens works
A camera lens has an array of optical lenses (you learnt about convex and concave lenses in school right?). The job of this lens arrangement is to focus the incoming rays accurately on the sensor. The accuracy of the lens greatly depends on the architecture(arrangement) of these lens elements and the materials that go into making these lenses. 

Image Courtesy: cambridgecolor.com
 ~ Building blocks: More than often, the price difference is due to the materials that are used to make these lens elements. For example, Nikon has this new technology that it has named "Nano Crystal Coating". I heard about this lens at a conference where one photographer thumped his chest and said "I finally bought a nano-coating wala lens" and all heads turned. By the time I turned around to see what the hulla was about, everyone had already prostrated in the direction of the now unanimously hailed sartaj amongst them :) Nano coating is some revolutionary low-refraction coating applied to lenses which reduces lens flare. So if you are shooting bright lights(like a street lamp or an oncoming car with headlights on) with such a lens, the glare cause by the bright light source will be quite reduced. This also reduces lens flares as shown in the below image. I borrowed it from Nikon's website which explains the Nano Coating funda. You can read up on it here. So if your lens has such a revolutionary coating, you can expect a pinch to your wallet.
Image Courtesy: Nikon.com
~ Image Stabilization: I have spoken at length about this feature in another post so I'll just mention that Canon uses the term IS (Image Stabilization) in its lens nomenclature while Nikon uses VR (Vibration Reduction). So if the lens is called 18-55 VR it means it has image stabilization mechanism in it and hence is higher priced as compared to a non-VR lens.

~ Chromatic Aberration & other cool/unwanted features: This is incorrect reproduction of colors due to the inability of the lens to focus incoming rays accurately on the sensor. Some lenses show obvious chromatic aberration in cases of high contrast or excessive brightness. Check out the below images. The one of the left is the one without chromatic aberration while the other has it. Do you notice the red border around the eagle's head? That is chromatic aberration.

Image Courtesy: cambridgecolor.com
Other problems that your lens can introduce you to are distortion, vignetting. Distortion is where the image does not seem to have been laid down on a flat pane. The below image is highly distorted - notice that the lines are not straight all through the image. The image has a bulging feel to it.
Image Courtesy: andrewwoods3d.com
Vignetting is the gradual darkening/brightening of the image around the corners. It is said that almost all lenses introduce vignetting to some degree though Nikon claims that one of its fisheye lenses (can't recollect which one) has no vignetting at all. The below image illustrates this effect.
Image Courtesy: wikimedia.com
So when a reviewer or a retailer labels a lens as a low-quality lens, it could be plagued by one or all of the above problems.

~ Lens speed: another very commonly used term to classify lenses is "fast lens". This simply means that the lens can take pictures at higher shutter speed owing to its wider  maximum aperture. For example, an 35mm f1.8 lens would be a faster lens as compared to an 85mm f3.5 lens since at f1.8 the lens is wider than it is at f3.5 and hence takes in more light and you can click an image of the same brightness with higher shutter speed or lower ISO.

~ Constant aperture: zoom lenses usually have a range of f values that it shuttles between as you zoom in/out the lens. The f-value of a lens is calculated by the below equation

f-value = focal length (mm) / actual lens aperture
In the cheaper lenses, the actual aperture of the lens diaphragm does not change as you change the focal length (by zooming in/out). As such, as you zoom in the f-value keeps increasing due to the above equation. Take the 18-200 f3.5-5.6 lens for example in the Nikon stable. If you set the aperture to 3.5 at 18mm zoom, as you keep zooming in towards 200mm, the aperture value keeps moving towards 5.6. So you can't achieve a f3.5 aperture at let's say 50mm or anything above it. Now there's no need to panic - there are special lenses made for perfectionists who will not bow down to this architectural flaw. These lenses achieve fixed aperture values because the lens adjusts the actual aperture as you change the focal length. For example, a 12-24mm f4.0 Nikon lens will not change its aperture come what may. Rejoice! But it will cost ya! :) 

There are other premium features like Canon's USM (ultra sonic motor) which produces very low sounds during operation. Such lenses are suited for wildlife photography where animals can get spooked by strange noises.

So you can see that to judge the correct pricing of a lens, one needs to be in the know of the above and many more paradigms that plague photography equipment and need you, the buyer, to either compromise and settle for low-performance options or to shell out the extra buck for improved performance.

10 January 2012

Let's get technical - White Balance

No smart-ass title this time because I am in a bit of a rush while I pen down this article :p Photography-workflow follows the age-old quality philosophy of 1-10-100. If you weed out an anomaly or unwanted element at the first stage you will need 1 unit worth of effort. If it is attended to at the next stage, the effort required multiplies ten fold! Often we ignore the camera settings while clicking a pic because of a repetitive consolatory voice in our head that goes "photoshop hai na" :) But when you have too many clicks from a photoshoot to edit, believe me, you'd wish that you had customized the camera's settings to avoid making simple corrections to images in photoshop at a later point in time.

What is white-balance (WB)
Having pointed that out, let me talk briefly on the subject on white-balance in photography. Please understand that your camera captures the light reflected from your subject, the light which has originated from a light source like a CFL or halogen bulb, or a tubelight or natural day-light. The natural daylight contains a spectrum of colors across the VIBGYOR range which combine to form the seemingly colorless light. Artificial light sources usually have a specific light color (also labelled color temperature) which is not very obvious to the human eye but greatly influences the camera sensor. Such artificial light sources, like ones mentioned above alter the white balance of the image with their color temperatures. For example, CFL lamps have a greenish tinge to their light - our eyes see these bulbs as bright white but the camera sensors sees the light as green; halogen/street lights have a deep orange shade. Also, if the subject is in the vicinity of a colored reflective surface like a shiny carpet/curtain/table then the light falling on the camera will contain that color and hence the whitebalance of the entire image will be screwed up.

This has bugged me often in weddings. There's a lot of sickening yellow in the air. Ladies don yellow colored sarees and drown themselves in an uninhibited display of gold. I hate it when I forget to correct the white balance on the camera - I shoot anywhere between 200 to 500 images which I later have to correct painstakingly in photoshop. It takes me even a week at times to make such simple corrections :(

So coming to the topic at hand, if your light source is artificial, you should click a test image and check if it correctly reproduces colors as seen by your naked eye. The color alterations are more evident in dark areas like areas in the shadows.

If you know the light source that is causing white balance alteration, you can choose from the below preset whitebalance modes.
Image Courtesy: cambridgecolor.com
What any whitebalance setting does it that it compensates for the excess of color in the environment. For example, the light source is flourescent, like CFL lamps, setting WB to flourescent will add light on the other side of the light spectrum to compensate for the excess flourescent light in the environment. So, if your scene is lit by incandescent bulbs, your light is orange. The Incandescent WB will cause your camera to add a lot of the opposite color, blue and cancel out the excess orange light, thus giving you an image that is closer to actual colors.

Preset White Balance

These are some common WB modes that you would find on cameras:
  • Auto – this works well in most cases but it's better to try the preset or custom mode for a mishmash of light sources.
  • Tungsten – use this in case of bulbs or high-temperature light sources. This mode produces a cooling effect which reduces the REDish light tinge in the image.
  • Fluorescent – this is the opposite of tungsten and warms up the image.
  • Cloudy – this setting generally warms up the image a bit.
Custom White Balance
In a situation where there are multiple light sources or too many reflective surfaces producing a non-standard whitebalance like tungsten/flourescent/cloudy, etc use the custom white balance feature of your camera. What you need to do is simply point out to the camera, the object/surface that is actually white. So what you are telling your camera is "see..this object is actually white but the light source is making it look blue/orange/green or whatever..". So the camera calculates the correction to be made to make that object look white under that light source and applies the same correction to all objects in the frame! Simple ain't it? :)

That's how simple the concept of white balance is folks! So the next time you are out shooting dozens of pics, please keep a checklist ready and include white-balance checks in it.

6 January 2012

Meter down

Thanks to my friend Rahul Purbey, an avid enthusiast, I got a new topic to write on - Metering. Due to his persistent queries, I had to do quite a bit of research on the topic and I think I have answer to his root query - "what is camera metering?".

Image Courtesy: my3boybarians.com
Camera metering is the funda that comes into picture once you have chosen the ISO, shutter speed and aperture. These three determine the exposure levels of the captured image - how under/over/correctly exposed the image is.

Metering can be inbuilt (most of us use the camera's inbuilt metering system) or external (the ones we see on tv, used in photoshoots wherein a person holds a metering device infront of the model's face to measure light). I am talking about the inbuilt metering system here.

Once you push down the shutter button and wait for the camera to focus on the subject, the camera performs the metering function and shows results on the lcd screen. The result is displayed by different models/manufacturers differently. In the above image, the metering result is shown along a horizontal scale (circled in red) with the center of the scale being perfect exposure (according to the camera's metering algorithm; camera metering is not always accurate) and either side being over and under exposure.

In the above image, it shows that the image is heavily underexposed(the meter shows readings on the -ve side of the graph) and hence, your image will be very dark if you use the current ISO+shutterspeed+aperture combination.

There are different ways in which your camera performs metering. The usual modes are spot metering, center-weighted and matrix/evaluative metering. Spot metering uses a spot on the frame to perform the metering process and determining whether that spot will be overexposed or underexposed. Center weighted metering, as the name hints, uses a small area around the center of the frame to perform metering. Matrix metering uses many more points spread out around the frame to perform metering.

So if you are concerned only about the rose in the frame and don't care if other elements in the frame get over/under exposed, use spot metering, and so on.

Its nice to put your grey cells to work while clicking a photo. Know the shutter speed, ISO and aperture settings and what exposures typical combinations provide. Also look at the meter before clicking. Look at it as a challenge - don't be a point and shoot user. Once you ready yourself for these challenges, you will actually enjoy and recommend photography as a hobby, instead of branding it as a piece of cake.

Happy clickin!
Sid

5 January 2012

Don't shake that booty!

I am a strong advocator of restraint when using flash for lighting; even if it is past sundown. I prefer to avoid the use of camera-flash altogether, as long as the subject is willing to stand still for those 5-10 seconds to avoid blur in the captured image. But keeping the camera steady for a speed less than 1/60th of a second (your camera will show this speed as 60 or 1/60 shutter speed) is nothing short of a herculean task considering that even in sufficient ambient light, blur begins to creep into the image below shutter speed of 60. So in this post, I will talk about some techniques that will help you discipline your body into standing still and reducing, if not completely eradicating camera shake.

The swan-elbow technique
This is a body posture that helps me steady myself while standing. Through practice I have near-perfected the posture over time. I call it the swan-elbow technique simply because it focuses on resting your elbow on your waist and in the attempt, you assume a pose resembling a meditating, relaxed swan.

Keep your feet apart such that you can stand without wobbling. The minimum distance would be that of the width of your waist. I was about to assume that you are a right-handed person and I realized - cameras are not made for left-handed people! Wow! He he..

Coming back to the topic at hand, you would be placing the camera body on the palm of your left hand and using your right hand for the shutter. Place the left elbow on your left waist. In the process, you will lean forward and your back will arch forth like the neck of a swan.

Now comes the difficult part. Learn to hold your breath. This is how snipers train. They learn to hold their breath and slow down their heart rate. A slow or soft beating heart leads to less tremors in the body and hence greatly reduces camera shake. Practice holding your breath in this pose and you will see that over a period of time, you can actually greatly reduce camera shake through this technique!

Also, keep your body comfortable - don't stress your muscles by extending your arms. Like your left arm, try to keep your right arm also close to the body. Be comfortable so that no part of your body feels pain/pressure/fatigue and leads to trembling.

The Lean Mean technique
No you don't need to slim down for this :p This technique simply hints at making apt use of solid structures to lean on them and stabilize your body to reduce camera shake. For example, instead of just standing and trying the swan-elbow technique, lean sideways on a pillar/column/wall, hold your breath and shoot - this is much simpler!

Put it down
Keep the camera on a stool or any elevated stable structure, look through the viewfinder and shoot. Though this will limit the angles that you can achieve (since the supporting object would have a flat surface), this will provide utmost stability to the camera unless you are standing on trembling ground.

So if you are not carrying a tripod around like a coolie, you can definitely work on the above techniques to get blur-free bright pictures in low-light conditions.

4 January 2012

VR / IS Lenses - should I foot the extra buck?

If you look at the brochure of any lens manufacturer, you will easily come across these VR (term used by Nikon) or IS (term used by Canon) lenses which seem to be similar to their counterparts without the VR/IS but are quite highly priced. For example, the Canon EF70-300mm f/4-5.6 IS USM is an IS lens as compared to the Canon EF75-300mm f/4-5.6 III. You can view these here. These are priced at INR 38,990 and INR 11,595 respectively. Though they don't have the exact same zoom range and USM is another differentiating feature between these lenses, I just used these near-siblings to exhibit the presence of lenses with/without IS.

What is VR/IS?
VR stands for vibration reduction and is the term used by Nikon. Its competitor Canon uses the term IS which stands for Image Stabilization. In either of these technologies, the underlying funda is simple - the lens mechanics detect the movement or the camera holder (the person who is using the camera) and compensates to a small extent for the movement/shake/vibration. Specifically, it compensates for pan and tilt of the camera. IS/VR features do not compensate for blur cause by the subject i.e. a fast moving car or a pouncing cheetah :)

So what's the big deal?
It is difficult for us to keep our hands absolutely steady while clicking a pic, especially when we are poised in unusual poses as we attempt to get that hatke angle. VR/IS is also useful when the lighting is not sufficient. It lets you slow the shutter speed by an additional 1 or 2 stops and yet achieve the same level of blur that you would have obtained in case of a non-IS/VR lens at a higher shutter speed. So you can slow down the shutter speed to 40 to let in more light and make the picture brighter, while still achieving the camera-holder induced blur-levels of a shutter speed of 60.

Should you pay the extra amount for a VR/IS lens?
I would suggest that you do. It's usually a small percentage over the price of the non-VR/IS lens but I personally believe that it's money rightly spent.